|
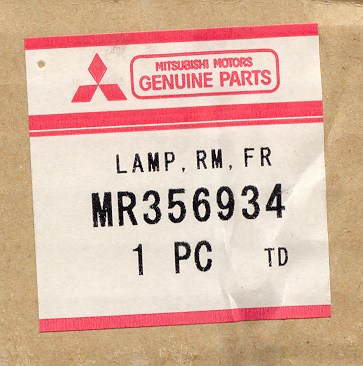
First of all. The correct part number for the entire dome light assembly, including bulbs, is MR356934.
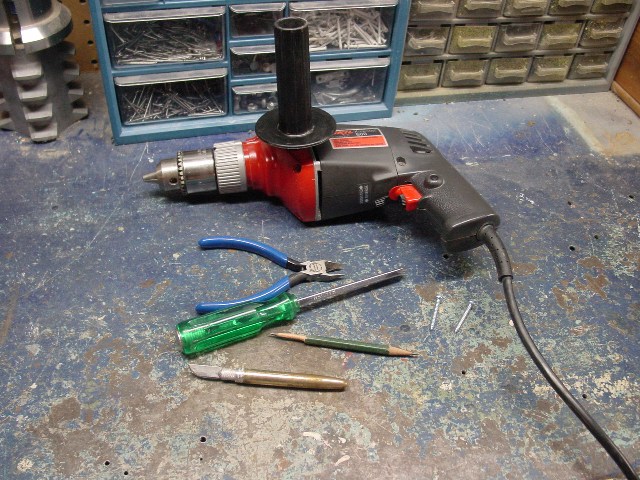
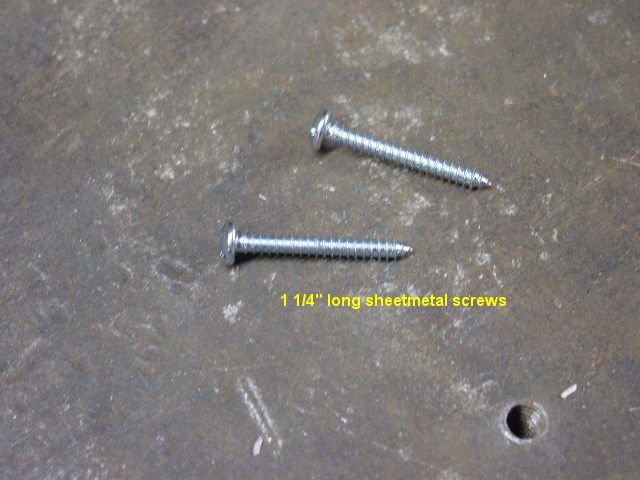
You'll need a pencil, phillips head screwdriver, a pair of side cutters, a sharp Xacto knife, a hammer drill (or a regular drill if that's all you have), a vacuum cleaner and two sheet metal screws approximately 1 1/4" long.
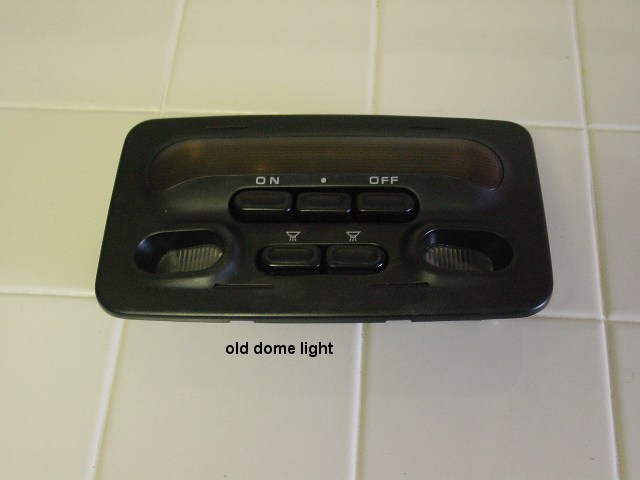
You start by removing the old lamp assembly. Grab the front side of the assembly, pull down slightly and pull towards the back of the car. This will unsnap the top portion of the assembly and you'll be able to easily pull it off. There are two screws holding the assembly to the roof. Remove both screws, drop the assembly down and disconnect the wiring harness. Easy enough so far...
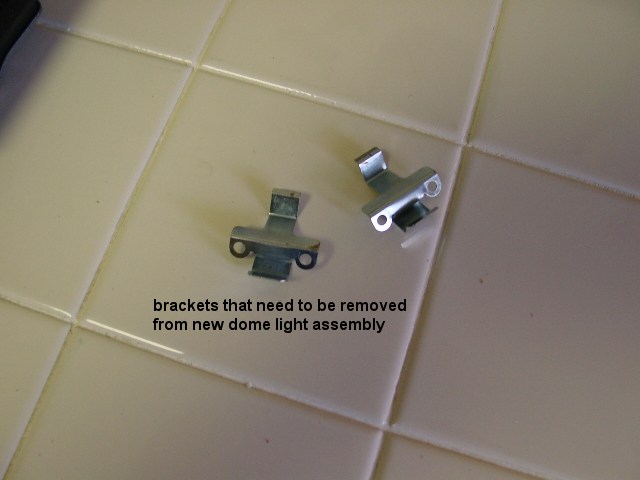
The new assembly takes up about the same amount of space as the old one but is totally different in how it bolts down. Nothing lines up. There are two metal clips on the front side of the new assembly. Remove them and replace the screws that held them down.
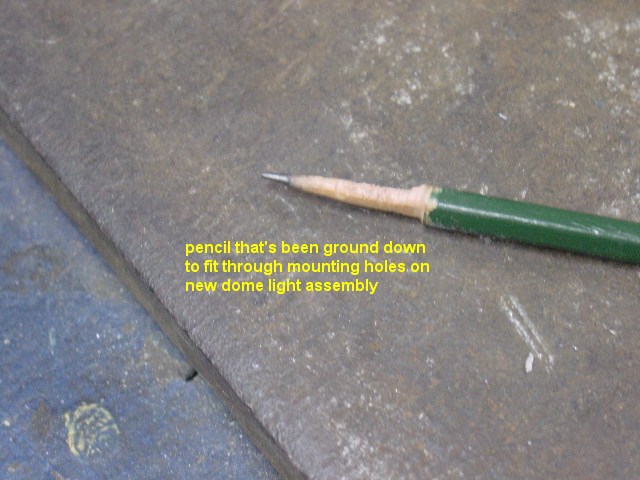
Take a pencil and grind it down so it'll fit through the mounting screw holes in the new light assembly.
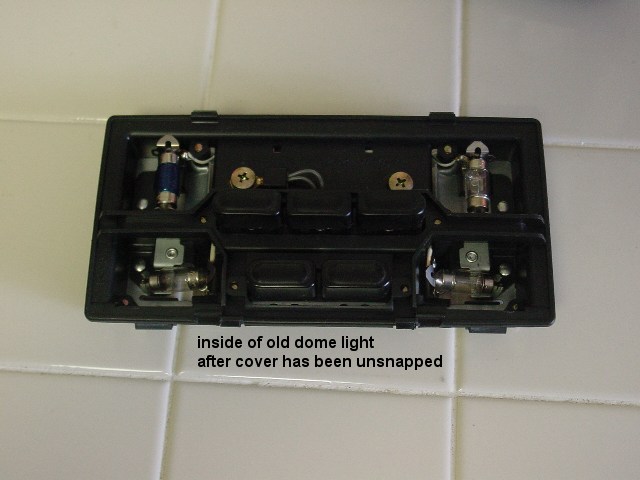
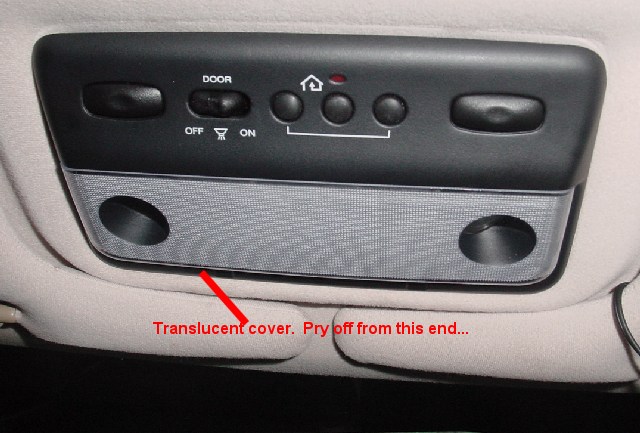
Remove the translucent cover from the new assembly. You'll need to pry it up from the edge furthest away from the homelink buttons.
You'll also need to pull the ground connector out of one of the holes so the pencil can pass through. Position the light so the controls and homelink are towards the back of the car. You'll notice that you'll have to cut a few small pieces of the headliner for clearance purposes. It's easier to do that after the holes are drilled as you'll know exactly where it's going to sit. Just lay the lamp on top of that portion of the headliner for now, keeping in mind you'll need to cut some of it out later. Get it exactly where you want it, and push the pencil through the holes, one at a time, and carefully mark where you want to drill the new mounting holes.
You'll need to be extremely careful here as you don't want to drill through the bracket and ding the inside of the roof. Or worse yet... drill all the way through. This is where a hammer drill comes in handy. You don't need to exert any pressure as it drills through, giving you a lot more control when you finally break through the bracket. The size of the drill depends on the diameter of your sheet metal screws.
I suggest a smaller drill than you think you'll need, for the first pass. It's a lot harder to make a hole smaller. Drill the two holes, holding the nozzle of the vacuum cleaner close to the point of contact. This should get rid of most of the chips and dust.
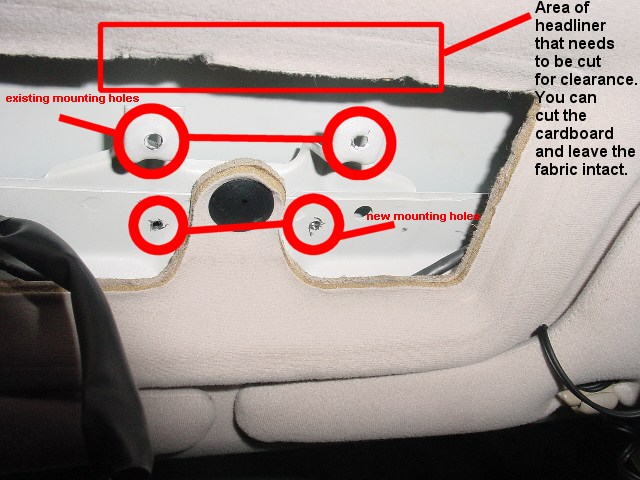
Loosely screw the unit to the roof bracket. Mark where you'll need to cut the headliner. Remove the screws and cut out the necessary pieces of the headliner with a pair of side-cutters and/or an Xacto knife. Plug the wiring harness into the lamp, screw the lamp to the roof... and put your tools away. Not so bad, huh?
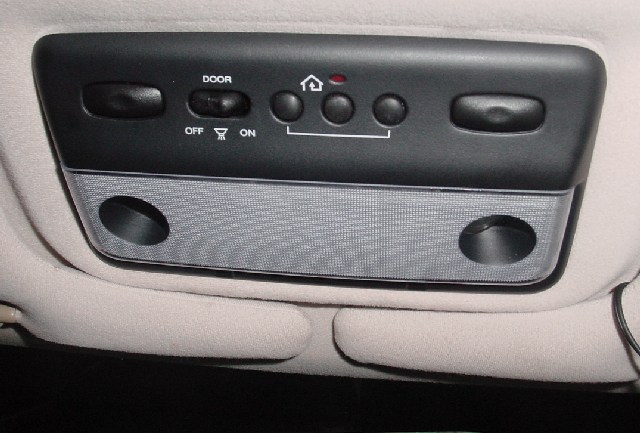
To program the homelink to your garage door opener, you may need to replace the battery in the garage door opener remote first. The newer the battery the better the signal. You may also want to unplug your garage door opener, or drive the car out of range, so your garage door doesn't bounce up and down, irritating your spouse.
Press and hold the first and third buttons on the homelink system. Wait until they begin to flash. This may take thirty seconds or so. When they begin to flash, release them. Hold the remote about 4 inches from the homelink system. Depress the homelink button that you want to act as your garage door opener as well as the button on your existing remote. Wait until the lights begin to flash quickly. Release both buttons. Plug your garage door opener back in, or drive back in range, and test. Should work...
|
|
|
